
Before the era of smartphones boomed, getting a great picture was such a task concomitant with a really long process. One would have to buy a fancy camera and good editing software for their computer, and invest a lot of time and energy into learning how to use them.
Thankfully, today, we don’t have to go through all that struggle. Our mobile devices and the editing apps that come with them have made the process a lot easier and effortless. We can now take high-quality photos and edit them without any hurdles all from the same device that we use to make calls.
Now, despite being so privileged if you still don’t make the best use of it wouldn’t it all be such a waste? Let’s learn how to get professional pictures with just your smartphone.
1. Upgrade Your Camera App

Android’s original camera app is sufficient for taking photos, but you’re not limited to that app. There are many camera apps available online that can assist you to take better, clearer pictures. Make sure to use these great apps including features such as anti-blur, grid squares to line your shots up properly, and advanced editing and sharing options.
2. Start With Clean Lenses

Your smartphone is used a lot more than any standard camera which is used just for photography. Your phone is in your hands or pocket, all day long. Thus, its lenses are very prone to get dirty. Trust me, you have no idea how just a little smudge or a fingerprint on your lenses can ruin a great shot. So before taking any photos, always clean the lenses first with a soft cloth.
3. Shoot in Natural Light

Always remember that photography is nothing more but just a process of capturing the way light falls on a subject.
When it comes to smartphones, they work the best in natural light and struggle in low light.
If you’re outside, the best light for clicking pictures would be during the “golden hours”, which is an hour after sunrise or an hour before sunset.
4. Focus on Only One Subject

Many of the best photos comprise of only one, interesting subject. So, when clicking a picture, spend some more time setting up the shot. It’s recommended to always ensure that the subject isn’t filling the entire frame and that two-thirds of the photo is negative space.
5. Use Gridlines
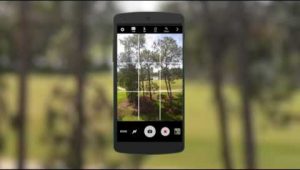
Gridlines are the best way to easily find balance in any shot. Gridlines are nothing but a series of 4 lines that divide the shot into 9 sections showing up on the screen as you click a picture. When taking a photograph, the subject has to be placed on these lines.
6. Get Closer to Your Subject Instead of Zooming In

Most of the phones are provided with a zoom function, but you should never use it. In order to enlarge the image, it compromises on the quality, resulting in grainy, blurry images that you’re probably too embarrassed to share.
So, rather than using the zoom function, get as close as you can to your subject. If you have too much background in the photo, you can always crop it later without sacrificing on the quality of the photo.