

Years ago when the term “blog” hasn’t even come into existence, people were writing personal stories in different online formats. Back in the 90’s, individuals used to write online journals and diaries where they were able to express feelings and share information. Since then, those diaries evolved into the whole blogging industry, blogs saw a meteoric success and became a trend that everybody wanted to follow.
Now, it’s time for you to learn how to start a WordPress blog of your own. You surely can use any web hosting company. But we would recommend using bluehost web hosting as it is very popular and the most used web hosting company. Let’s begin,
STEP 1 – Visit The Bluehost Site

Visit the site, Bluehost.com and click on the “Get Started Now” button.
STEP 2 – Select A Hosting Plan For Your Blog
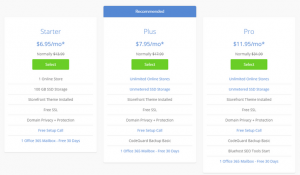
If you are a beginner, choose the basic plan as it will cover all the fundamental needs of your site’s functioning.
Once your blog is old and starts receiving heavy traffic, you can consider upgrading to the prime version of your hosting plan, which offers advanced features better suited to handle the massive inflow of traffic.
STEP 3 – Enter A Domain Name
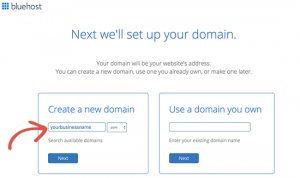
If this is your first time with a WordPress blog, you will have to register a new domain. Enter a name, and choose the extension from the drop-down menu next to it. There are different domains you can choose from including .com, .net and .org to name a few.
After clicking the “Next” button, Bluehost will check the domain and let you know if it’s available. If the domain name is free for usage, you can proceed with the registration process. If not, you will have to go for some other name for your blog.
STEP 4 – Register Bluehost Account
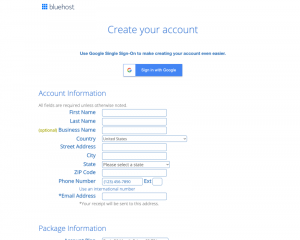
Bluehost will then take you to the registration form, where you’ll fill in the billing details along with your personal information.
STEP 5 – Select Your Hosting Options
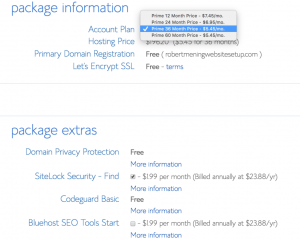
The 36-month package would be the best to start with as it gives you a considerable discount and also you won’t have to worry about renewing your package for a long time. But you can also consider the other options – after all, hosting is a long-term investment. You could always remove unnecessary features from your package in the initial stages of your blog launch and add them back later, whenever you feel the need.
STEP 6 – Set Your Password
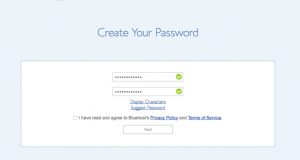
You’ll set your password after you’ve entered your payment information, as the final step in registering yourself with Bluehost. This same password will be used for verification purposes.
STEP 7 – Log in To Your New Account
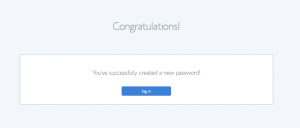
Congratulations! You are now the proud owner of a brand new website. Login to your Bluehost account to proceed with the setup.
STEP 8 – Choose Your WordPress Theme

Now you’ll be given an option to choose a WordPress theme – pick one that suits your brand and represents your website in the best way.
If none of the displayed options work, visit WordPress’s repository to choose a theme from the choices shown there.
STEP 9 – Welcome To WordPress
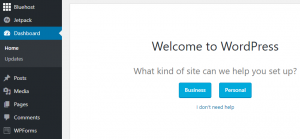
You’ll be greeted by a “Welcome” message once you log in. Then, BlueHost will guide you in creating a blog. In case you don’t need supervision when setting up a blog, it also offers you the option to continue on your own.
And this is it! You can now go to the WordPress login page and start working on your blog.